Sunday, July 22, 2012
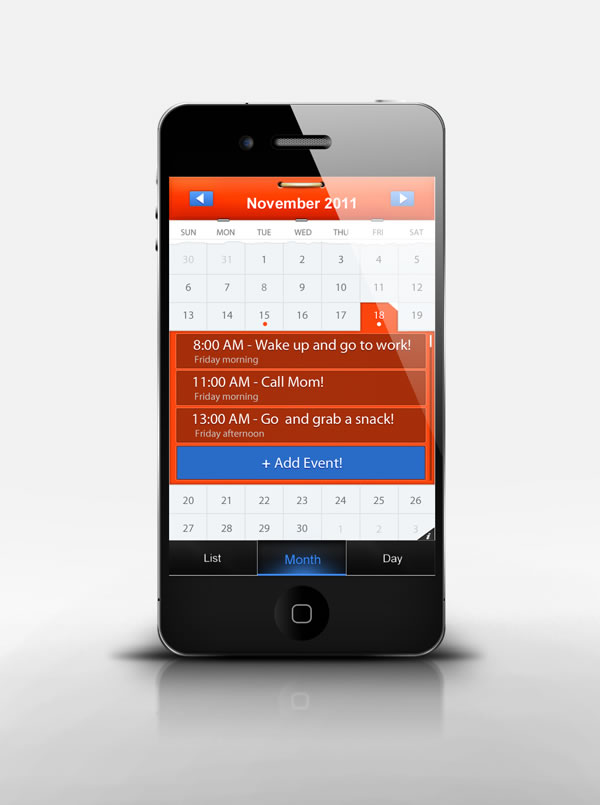
In this tutorial we will show you how to design a Mobile Calendar App in Photoshop. Let’s get started!
By : Paul Flavius
Tutorial Assets
Step 1
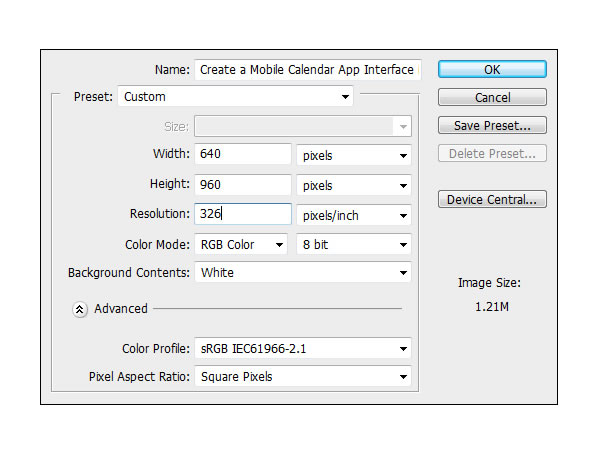
Create a new file. Set Width to 640 and Height to 960 and the resolution to 326 PPI.
Step 2
Make a new Group and name it Header. Using Rectangle Tool (U) make a rectangle shape just like the one in the example, set the fill color to #ff3600 and apply the Layer Styles. Here you will have to download and install this Custom Pattern, which will be used throughout the tutorial on different steps.

Step 3
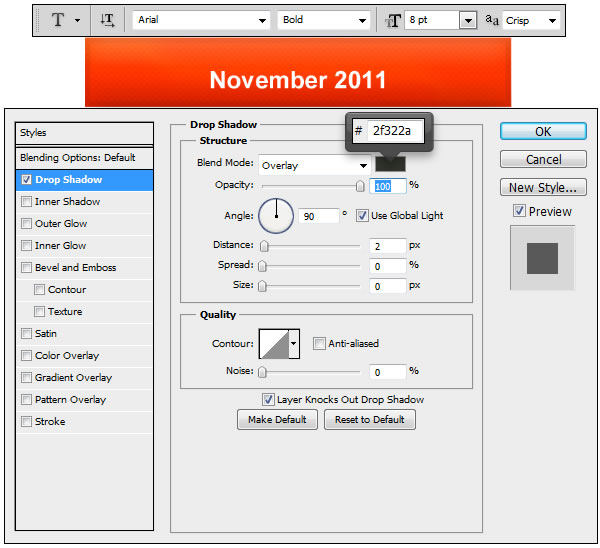
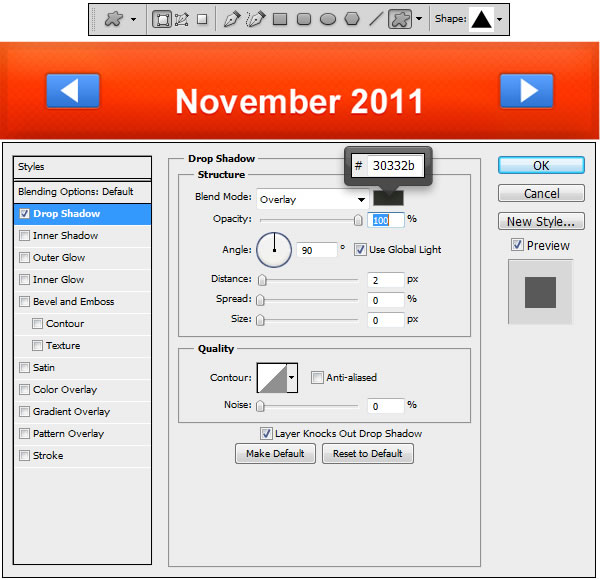
Now using Horizontal Type Tool (T) write down “November 2011″ and apply the Layer Style.
Step 4
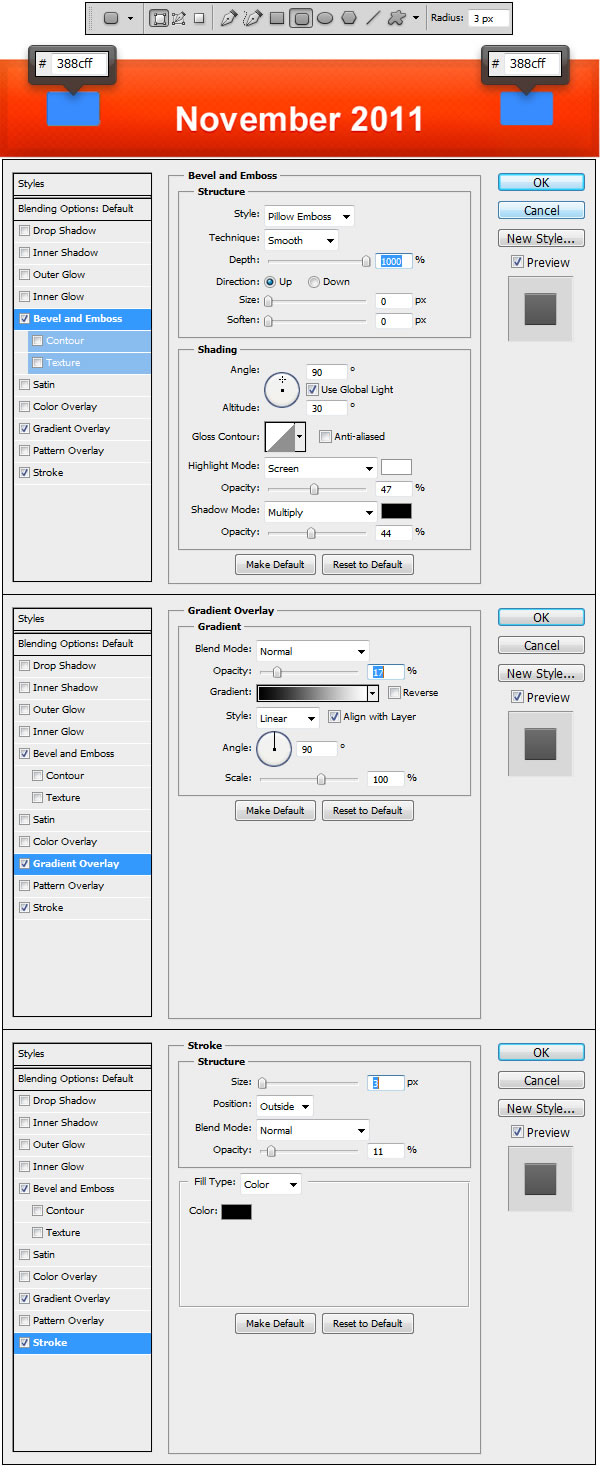
Using Rounded Rectangle Tool (U) set the Radius to 3px and make two shapes like the ones in the example. Set the fill color to #388cff and apply the Layer Styles.
Step 5
Use Custom Shape Tool (U) and load the custom set called Shapes, from where select the Triangle shape and draw two triangles just like the ones in the example. Apply the Layer Style.
Step 6
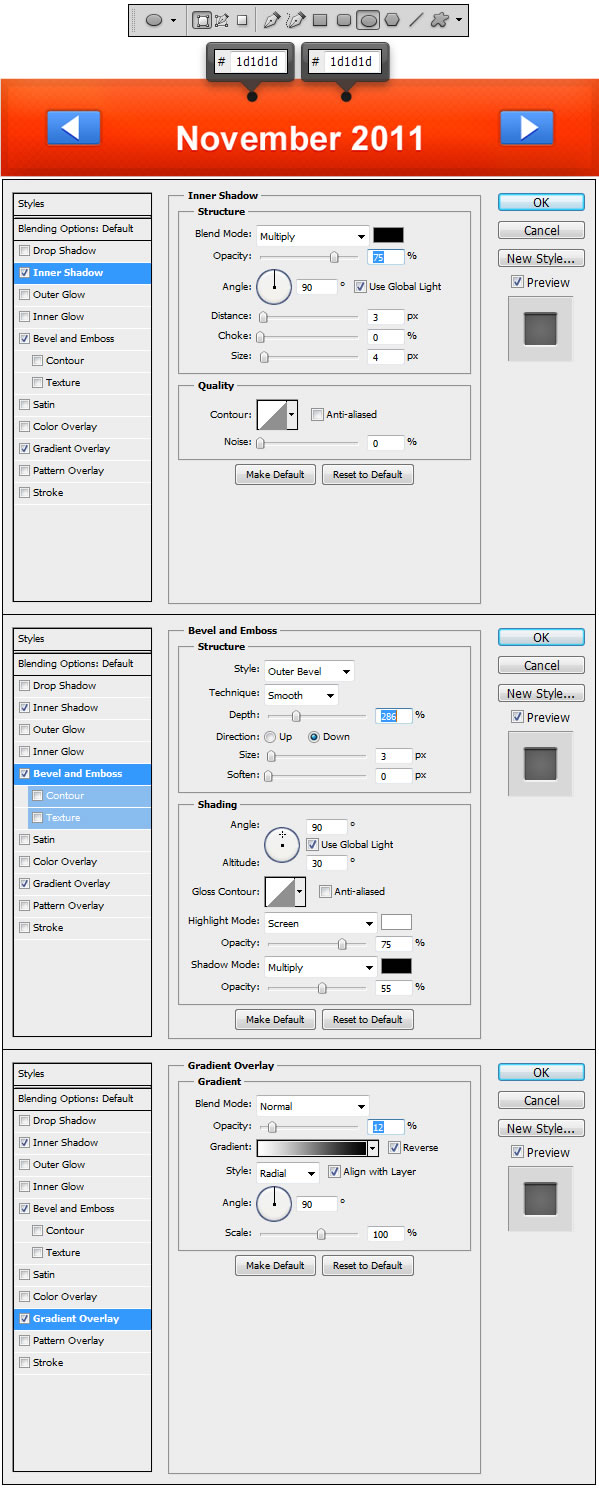
Now using Ellipse Tool (U) make to circles like the ones in the example, set the fill color to #1d1d1d and apply the Layer Styles.
Step 7
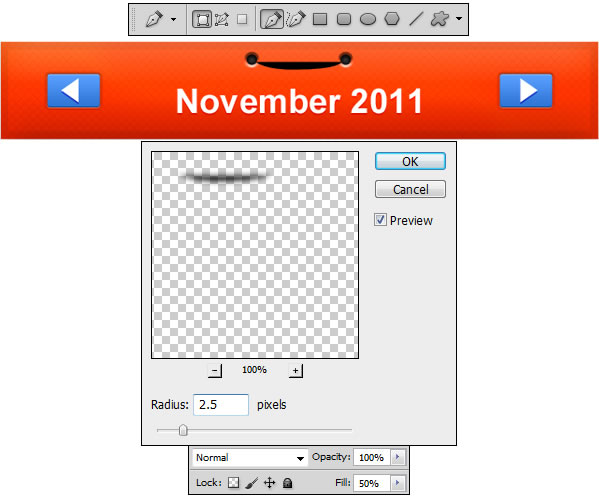
Draw a shape just like the one in the example using Pen Tool (P), afterwards go to Filter > Blur > Gaussian Blur and set the Radius to 2.5px. Reduce the Fill level to 50% and proceed to the next step.
Step 8
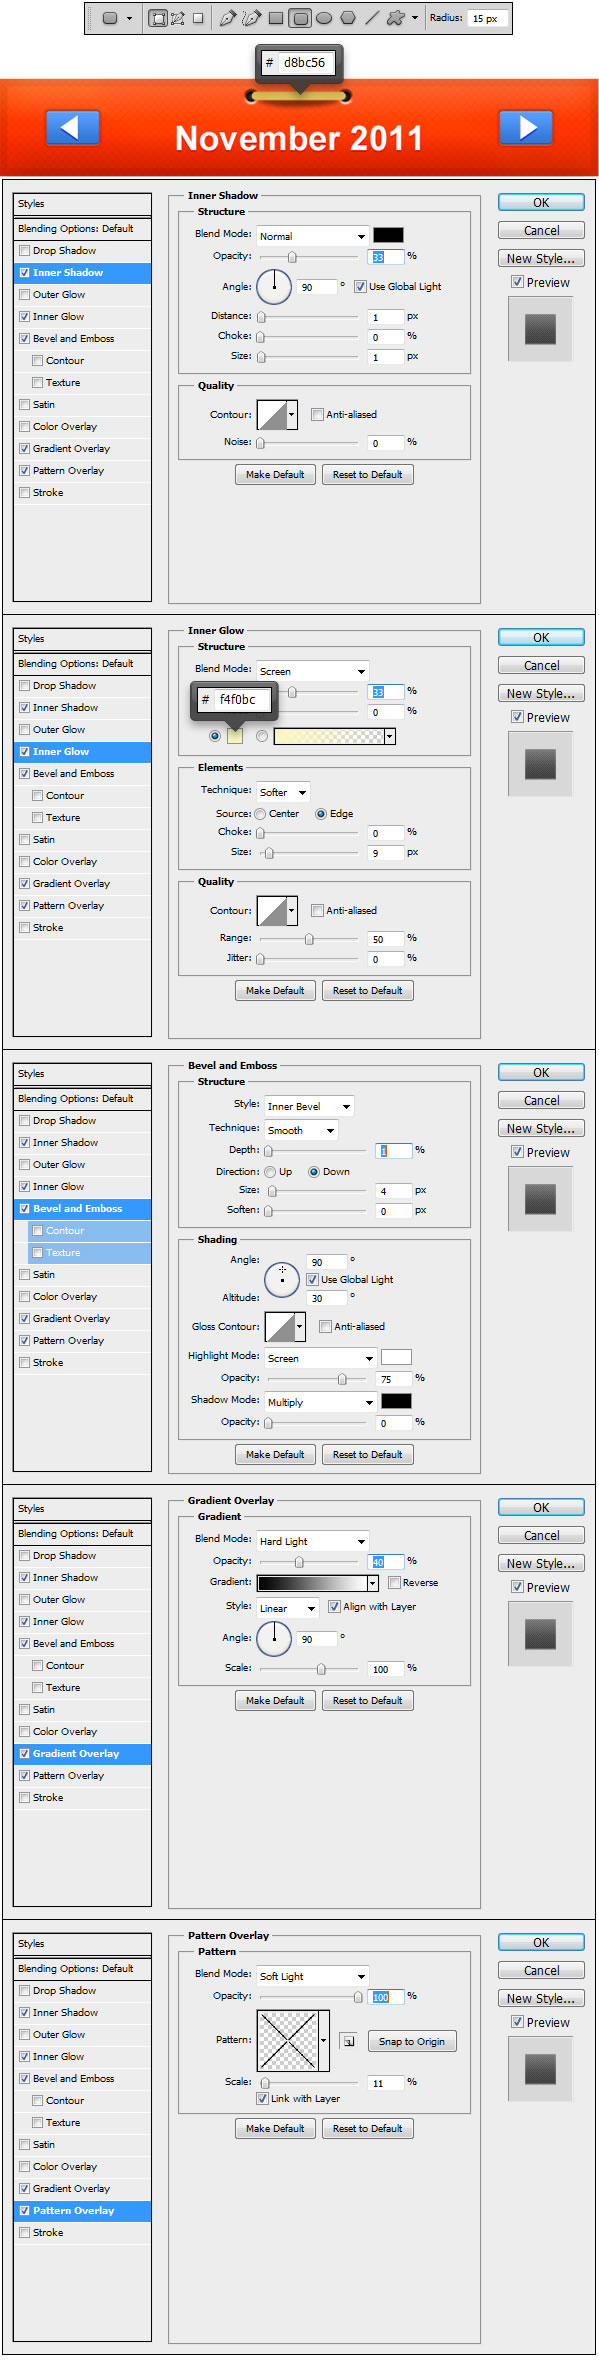
Using Rounded Rectangle Tool (U) set the Radius to 15px and draw a shape like the one in the example. Set the Fill color to #d8bc56 and apply the Layer Styles.
Step 9
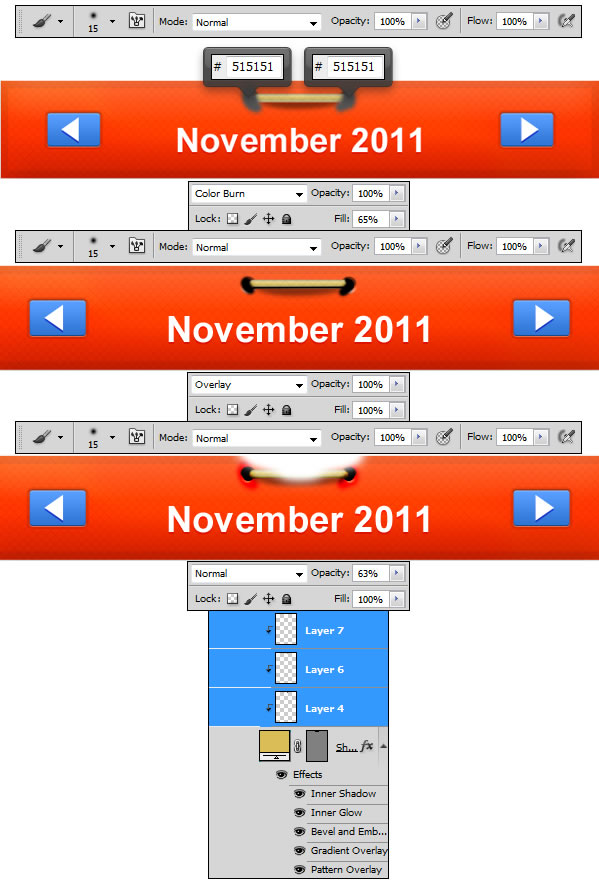
In this step we will apply some shadows and highlights to give more depth to our elements. Using Brush Tool (B) pick a medium size brush and like indicated in the example above make different color strokes and change the Blending mode for the layer and the Fill level as indicated in te example. When you are done creating this 3 layers you will have to select them and transform them in to Clipping Masks.
Step 10
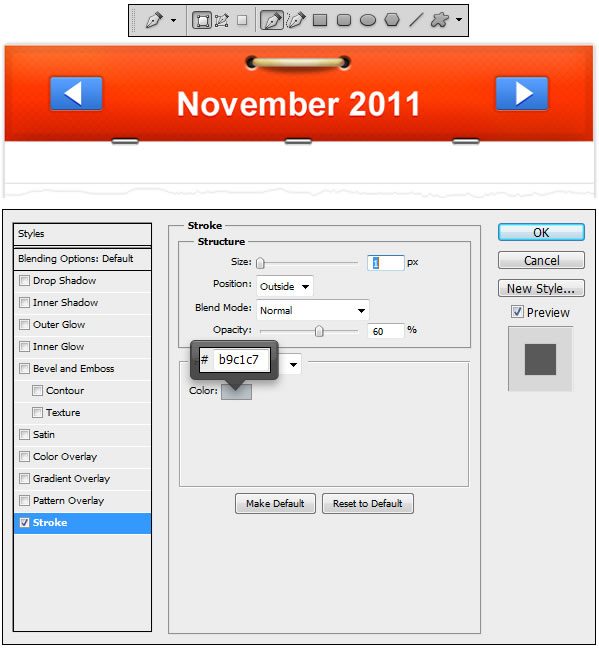
Make a new Group and name it Staples. Now using Rounded Rectangle Tool (U) set the Radius to 15 px and draw three shapes just like the ones in the example. Set the fill color to #9f9f9f and apply the Layer Styles. Be sure to use the same colors in the gradient used for the Stroke Style.

Step 11
Make a new Group, name it Category and place beneath the previous Group Header. Now using Rectangle Tool (U) draw a shape like the one in the example and apply the Layer Style.

Step 12
Now using Pen Tool (U) we will draw a shape with a zig zaggy bottom that imitates a torn paper. Try to be as natural as you can so the final result doesn’t look like something very precise.
Step 13
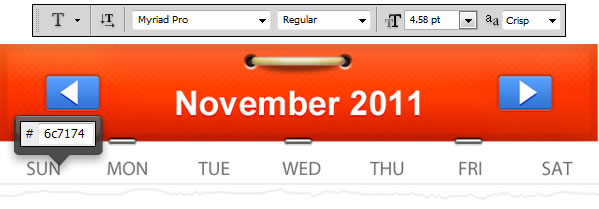
Using Horizontal Type Tool (T) set the Font to Myriad Pro and the Font size to 4.58px and write the same words like seen in the example. Set the Fill color to #6c7174.
Step 14
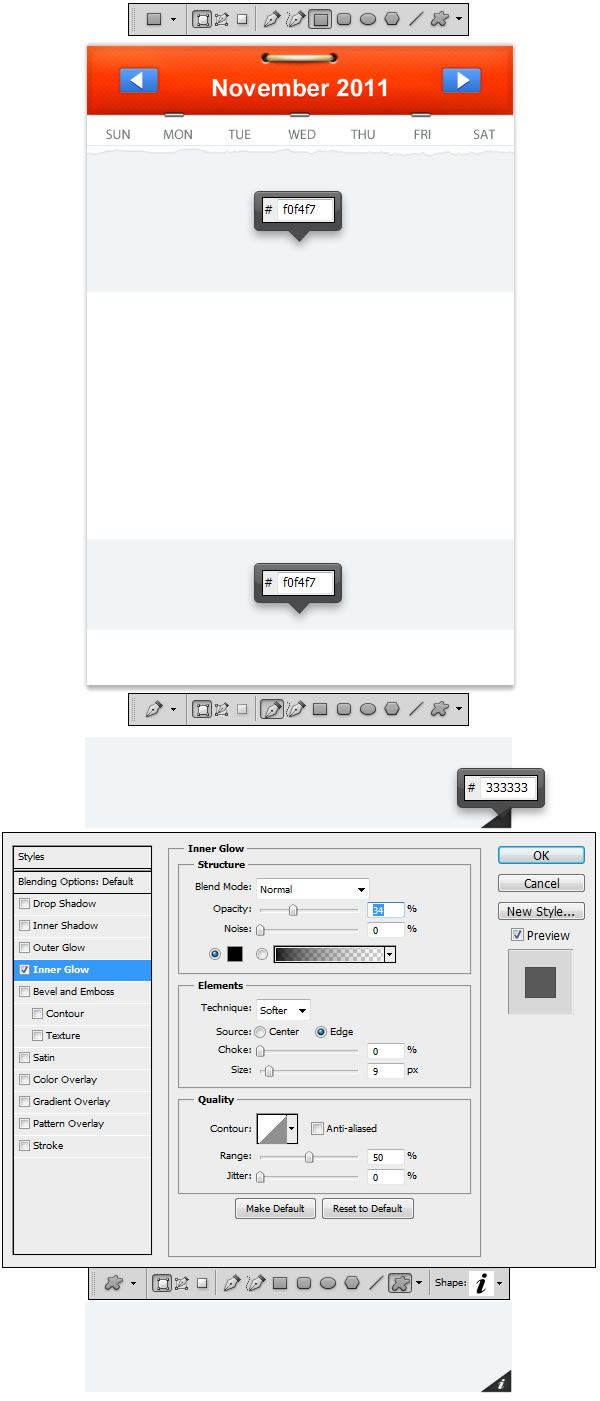
Now with the help of Rectangle Tool draw two shapes just like the ones in the example. Set the fill color to #f0f4f7. Pick Pen Tool (P) and on the bottom right side of the last rectangle we did, make a black #333333 triangle just like the one in the example and apply the Layer Style. Now go to Custom Shapes Tool (U), load the Symbols shapes and place the Information symbol like in the example.
Step 15
Using Pen Tool (P) draw a shape just like the one in the example. Set the fill color to #ff4810 and apply the Layer Styles.
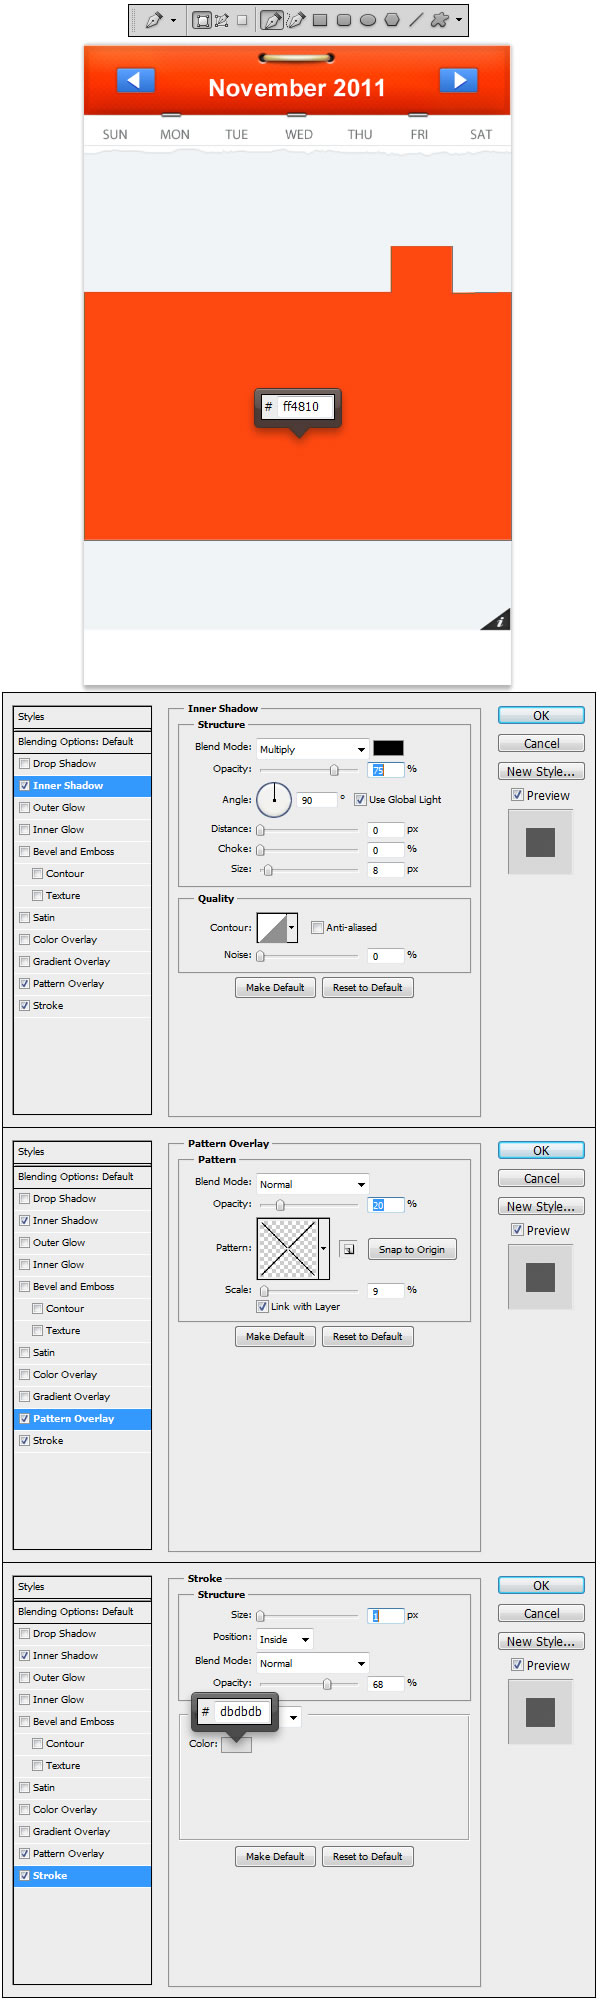
Step 16
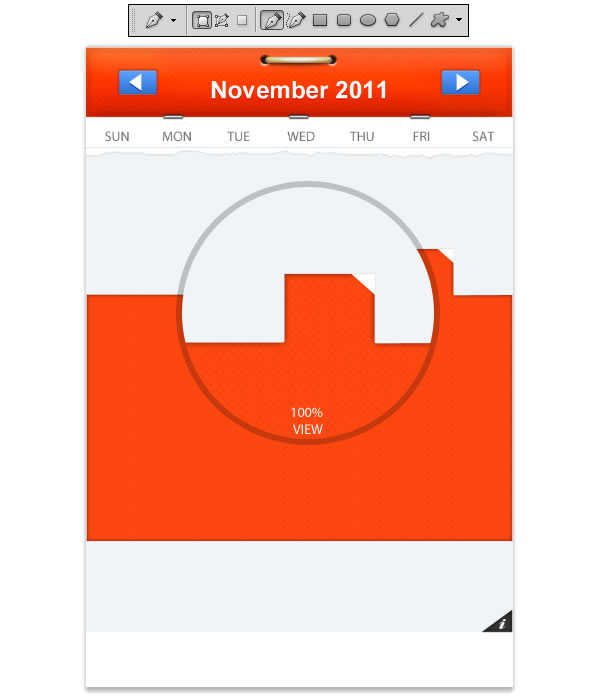
Once again using Pen Tool (P) make a white #ffffff rectangle just like the one in the example.
Step 17
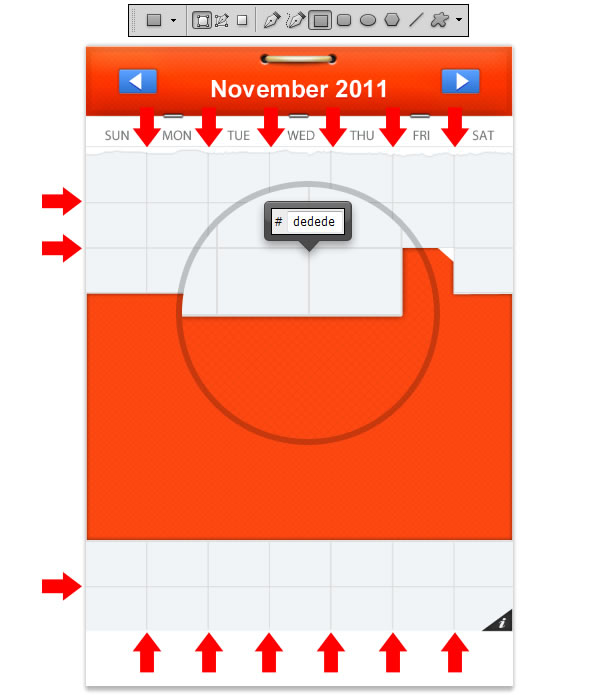
In this step we will make the Grid. Using Rectangle Tool (U) set the fill color to #dedede and build a grid like the one in the example.
Step 18
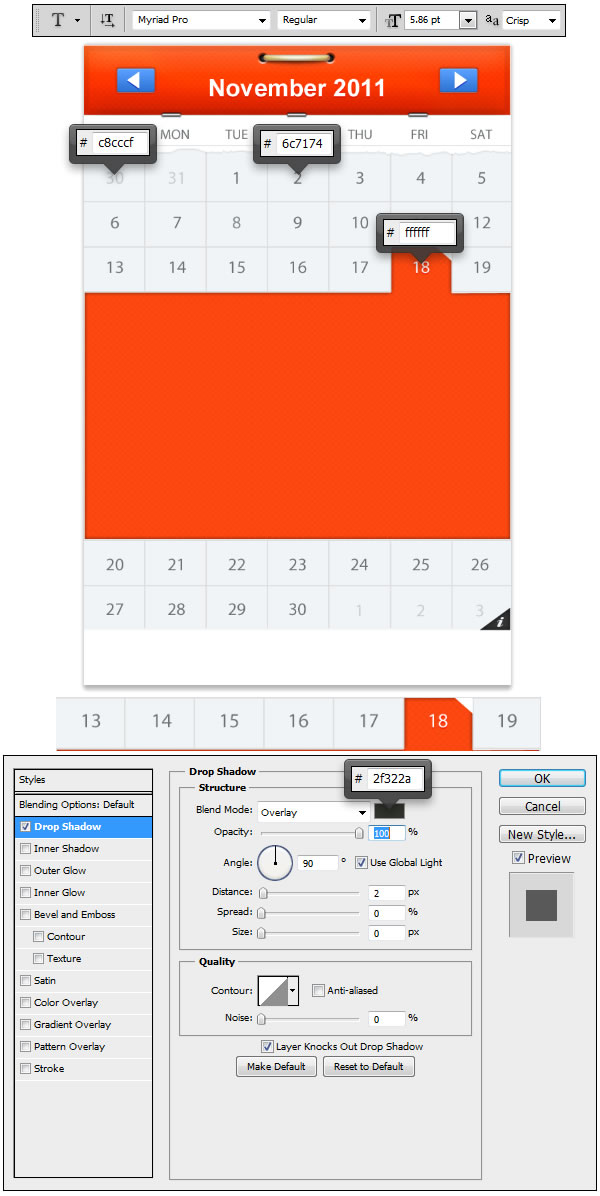
Now lets add some text in our Grid. Using Horizontal Type Tool (T) set the Font to Myriad Pro, and the Font size to 5.86pt and the numbers exactly like in the example. Use the indicated Text Color in the example for each category. For the white #ffffff 18 text apply the Layer Style in the example.
Step 19
Using Ellipse Tool (U) we will make two circles just like the ones in the example. Set the fill color for the left one to #fb4710 and for the right one to #ffffff.
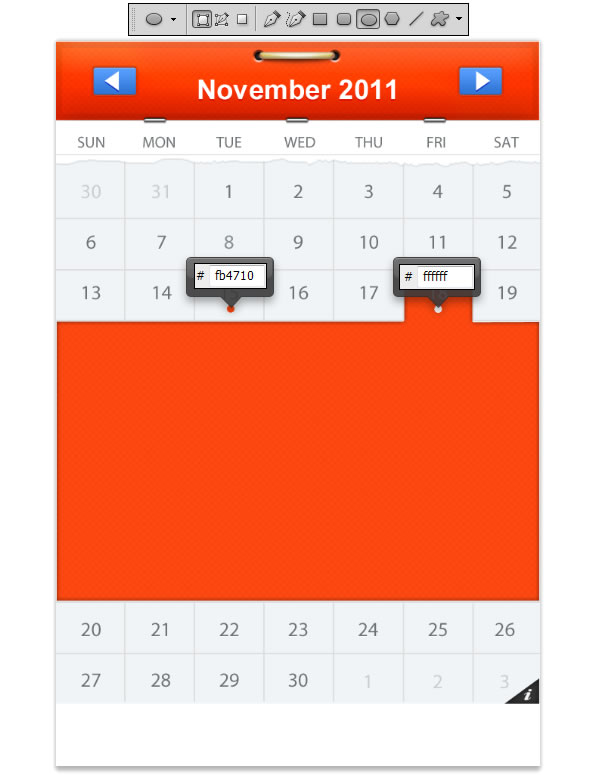
Step 20
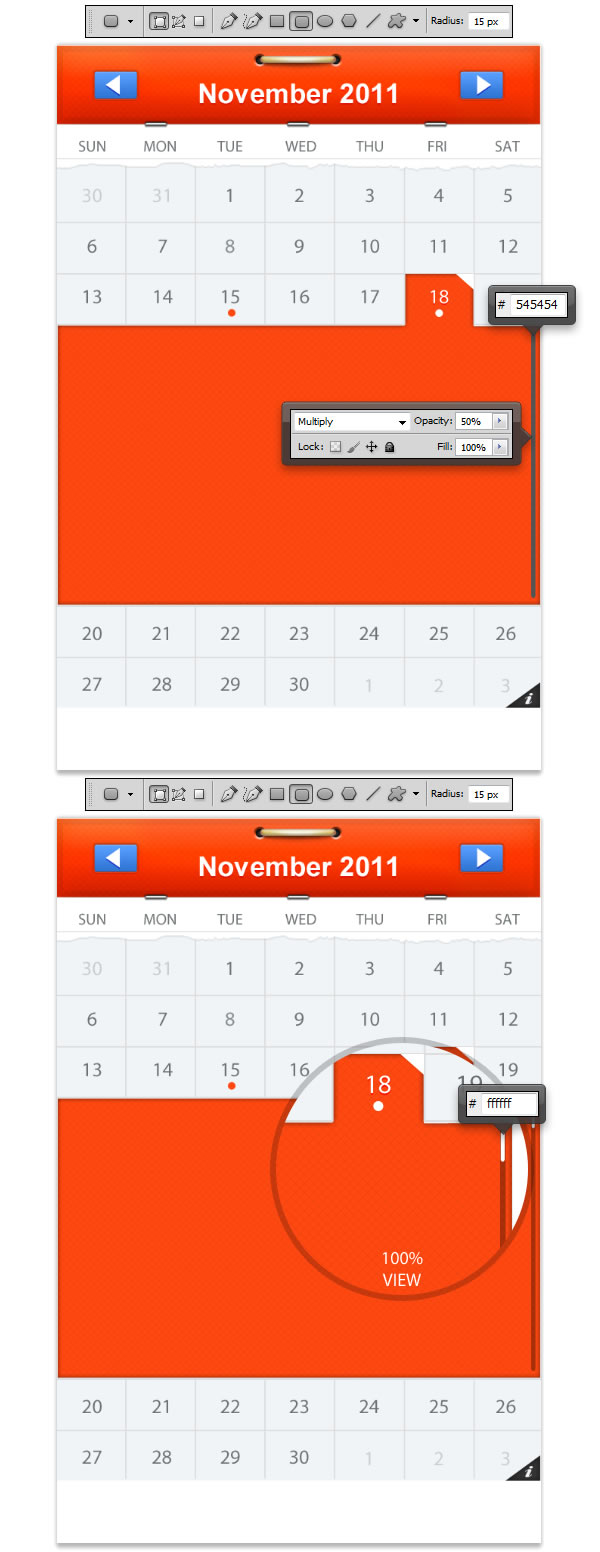
In this step we will be creating a content slider. Using Rounded Rectangle Tool (U) set the Radius to 15px and the fill color to #545454 and draw a shape just like the one in the example, than set the Blending Mode for the layer to Multiply and the Opacity level to 50%. Make another shape, this time smaller, and on the top part of the other one just like in the example.
Step 21
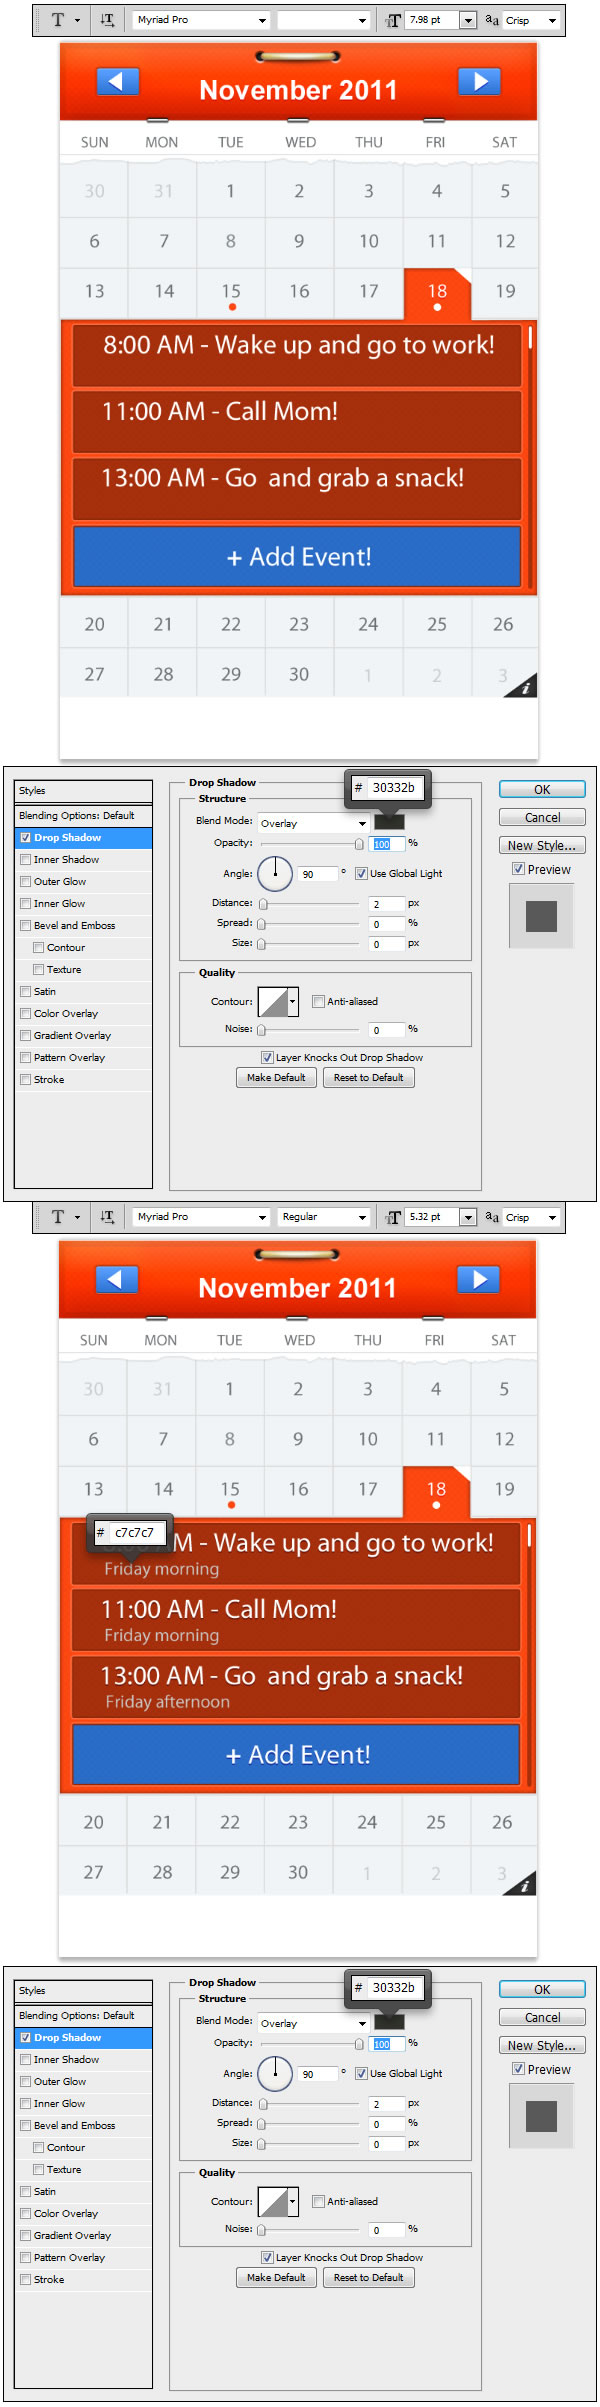
Using Rounded Rectangle Tool (U) set the Radius to 2px and draw three shapes just like the ones in the example. Set the fill color to #000000 and reduce the Fill level to 34%, afterwards apply the Layer Styles. Now using Rounded Rectangle Tool (U) keep the Radius to 2px and draw another shape just like the previous three, but change the fill color from #000000 to #296dca and apply the Layer Styles.

Step 22
Now let’s add some text to our tabs. Using Horizontal Type Tool (T) set the Font to Myriad Pro and the Font size to 7.98pt and add the same text like seen in the example and apply the Layer Style. We will add some more text, so using Horizontal Type Tool (T) keep the same font but change the Font size to 5.32pt and the Text Color to #c7c7c7, write down the same text seen in the example and apply the Layer Style.
Step 23
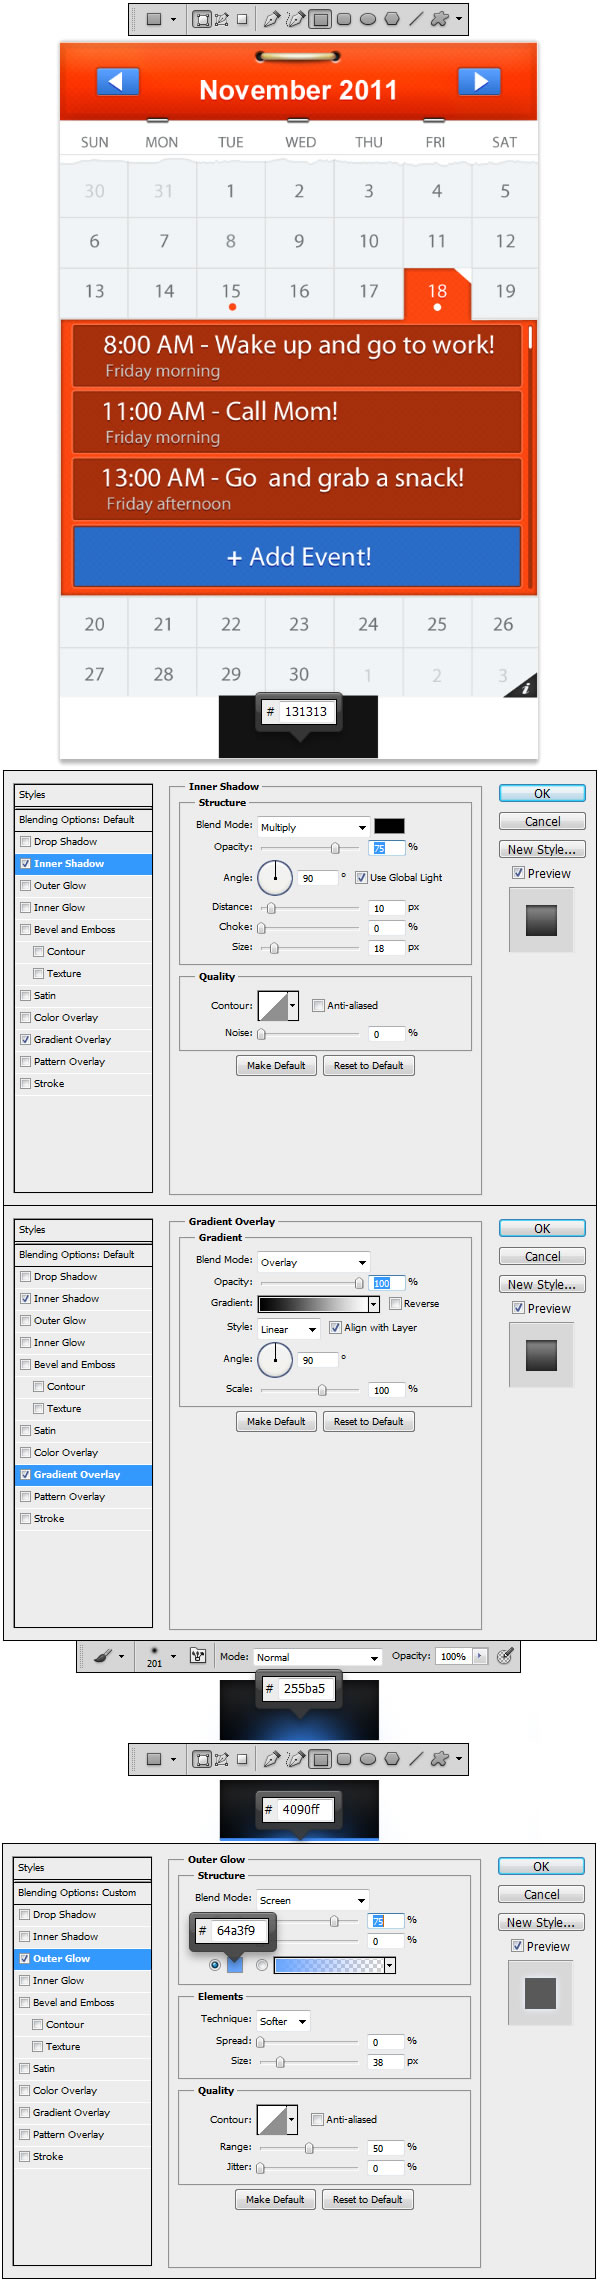
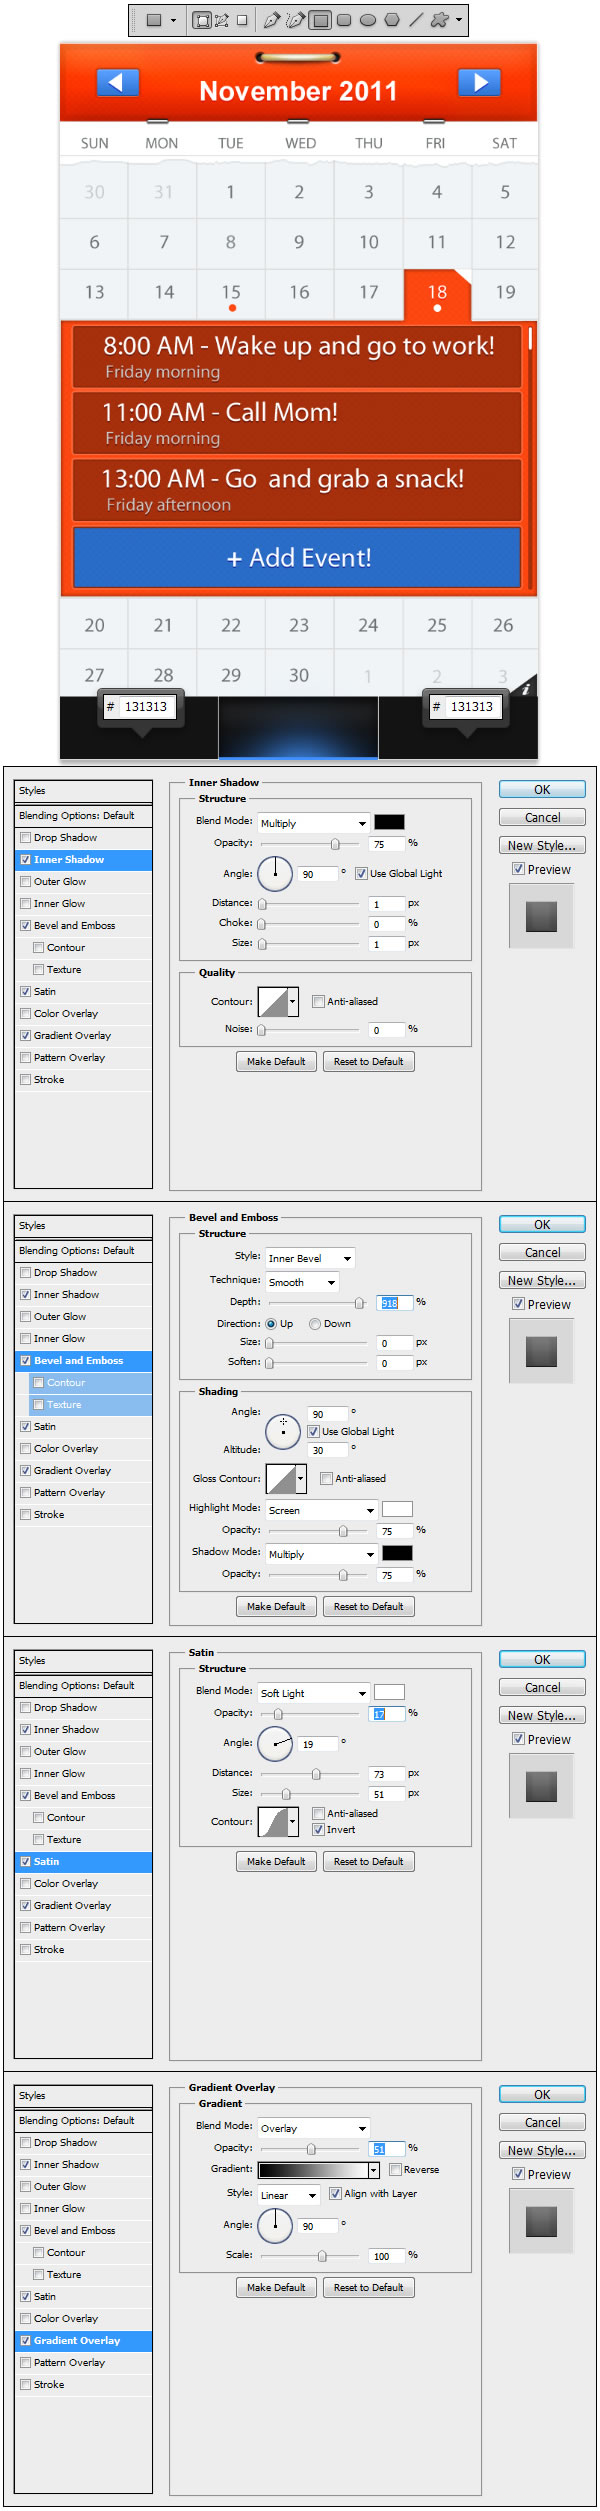
Create a new Group and name it Menu. Using Rectangle Tool (U) draw a shape like the one in the example. Set the fill color to #131313 and apply the Layer Styles. Make a new Layer and using Brush Tool (B) select a medium size brush with hardness set to 0 and fill color to #255ba5 and make a dot just like the one in the example. Next using Rectangle Tool (U) make a shape like the one in the example, set the fill color to #4090ff and apply the Layer Style.
Step 24
Using Rectangle Tool (U) draw two more shapes like the ones in the example. Set the fill color to #131313 and aply the Layer Styles.
Step 25
Final touch is to add some text to our menu tabs. Using Horizontal Type Tool (U) set the Font to Arial and the Font size to 6px and write down the text you see in the example for the side tabs. Set the Text color to #ffffff and apply the Layer Styles. Using Horizontal Type Tool (T) keep the same Font but change the Font size to 7px and the Text color to #3388fc and apply the Layer Style.

Conclusion
If you like, you can incorporate your design into an iPhone mockup.
Subscribe to:
Post Comments (Atom)
4 komentar:
Hello ,
It's a amazing Tutorial on creating Creating Mobile Calender App step by step guidelines. thanks for share such a nice article.Mobile App Development Services
Wow, What a Excellent post. I really found this to much informatics. It is what i was searching for.I would like to suggest you that please keep sharing such type of info.Visit here for Penetration testing services and Software testing services
Betting in your city - Sporting 100
Betting https://oncasinos.info/ in your 토토사이트 city 우리 카지노 - ventureberg.com/ Sporting 100 septcasino.com
Thanks for this post on how to make a calendar app using photoshop. However, this information shows more how to create a calendar layout and design, so if you can, please add information about the development process.
Post a Comment