Tuesday, July 24, 2012

In this tutorial I will take you through the steps and techniques of creating a golden compass. For this tutorial I’ve used just Adobe Illustrator and a heavy dose of ingenuity. Let’s get stared!
Designious
Step 1
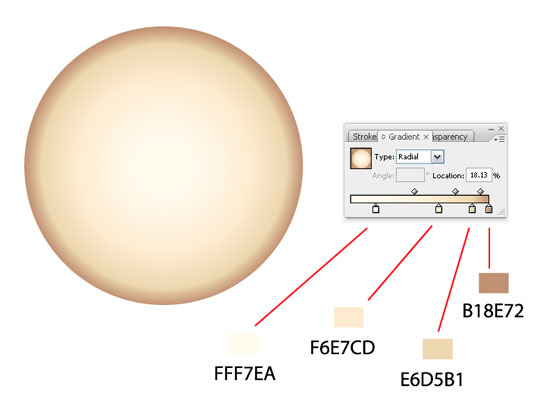
Create a circle (width 367px) with fill color and no stroke by using the Ellipse Tool (M). Make sure to press Shift while you create it so you get a perfect circle and apply a radial gradient, as shown in below.
Step 2
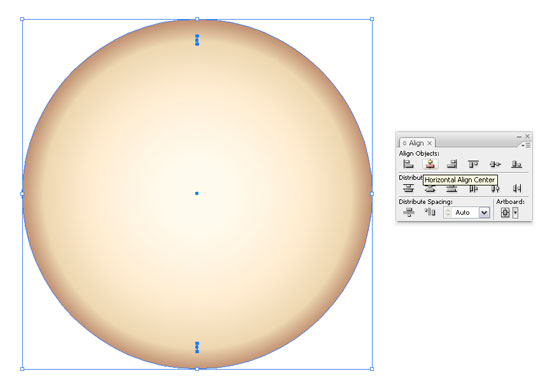
Let’s start with the markings. Create a rectangle (L) at a width of 0.688 and height of 13.044 – towards the upper side of the circle and replicate it towards the lower side (hold the Alt + Shift while you select and drag the upper one downwards).

Step 3
Select the rectangles using the Selection Tool (V). Group them together and align the two of them and the circle both horizontally and vertically on the center.
Step 4
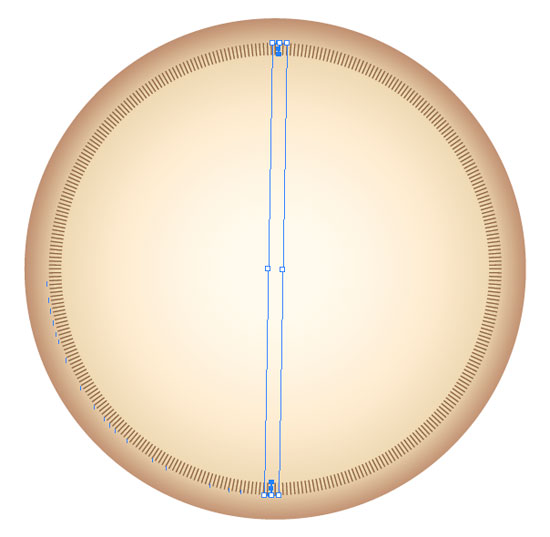
Select the rectangles (V) and rotate them using the Rotate Tool (Right-click > Transform > Rotate) by 1 degree and click copy in the Rotate Tool Dialog Box.

Step 5
Now press Command + D to repeat the rotate copy, and repeat until you get to complete a circle made of small markers, as shown below.
Step 6
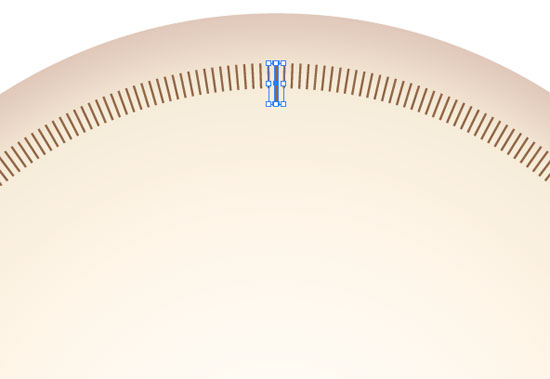
Select the middle rectangle from the top using the Selection Tool and enlarge its size downwards so this one stands out. You do this by dragging downwards with the Selection Tool (V) while you press the Shift key.
Step 7
While this marker is selected, copy and drag it downwards. Make sure you press both Alt + Shift while you drag it so it will be centered with the upper one. Once you’ve reached the bottom group them together (Command + G).
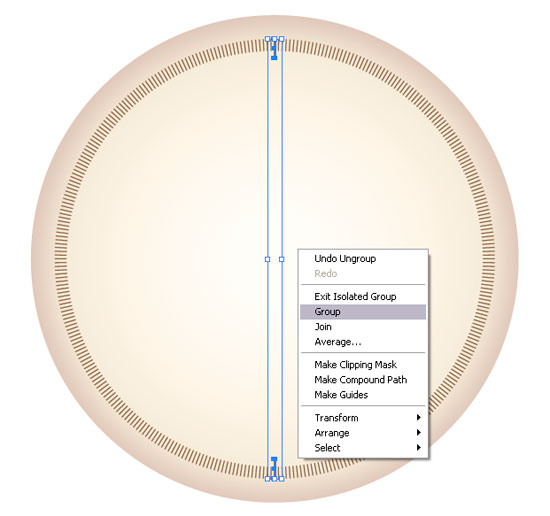
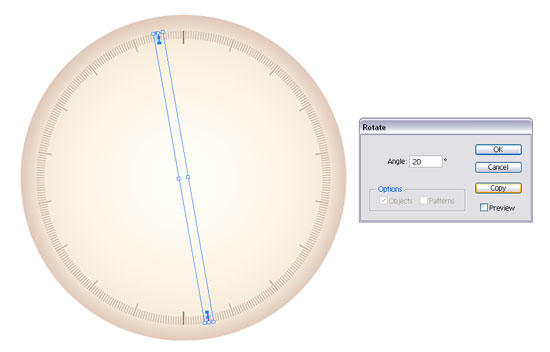
Step 8
Rotate the group by an increment of 20 degrees (Right-click > Transform > Rotate) and press copy in the Dialog Box.
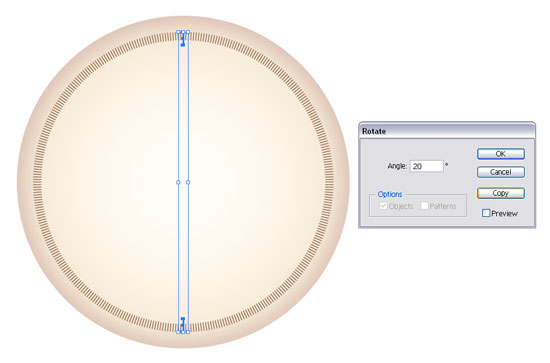
Step 9
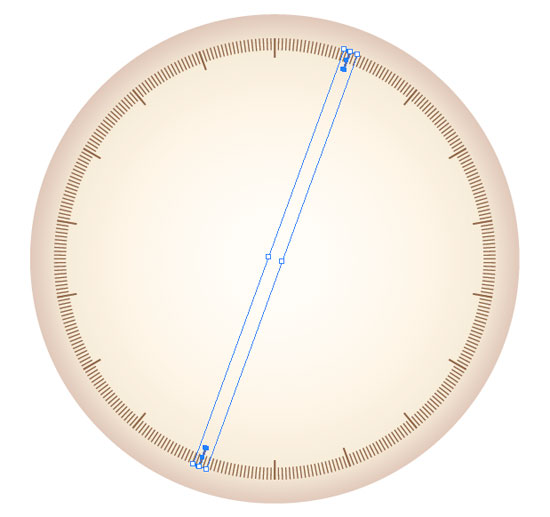
Duplicate the action in Step 8 until you covered all the circle by using Command + D.
Step 10
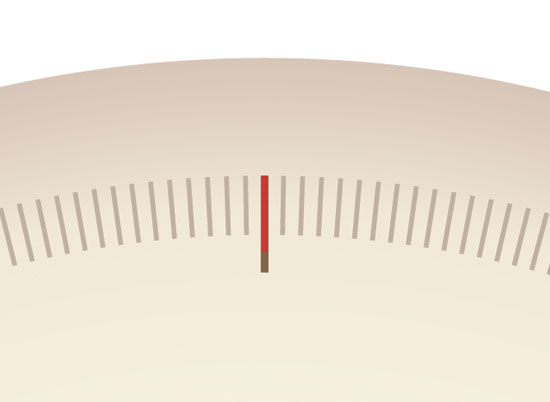
Now that we have the markers for the 20 increments, we’ll need the ones for the 10 increments. Select the center marker with the Selection Tool (V), copy and paste in front (Command + C and Command + F), then drag it from the bottom upwards by holding the Shift key so that the size is in between the small and big markers.
Step 11
Select the new marker with the Selection Tool and copy it downwards by dragging it while holding Alt + Shift.

Step 12
Group both of them (Command + G) and rotate by 10 degrees (Right-click > Transform > Rotate). This time in the Rotate Panel click OO.
Step 13
Select the rotated one group and rotate it again with 20 degrees, like in step 12 but this time press Copy in the Rotate Panel. Repeat (Command + D) until you get a full circle.

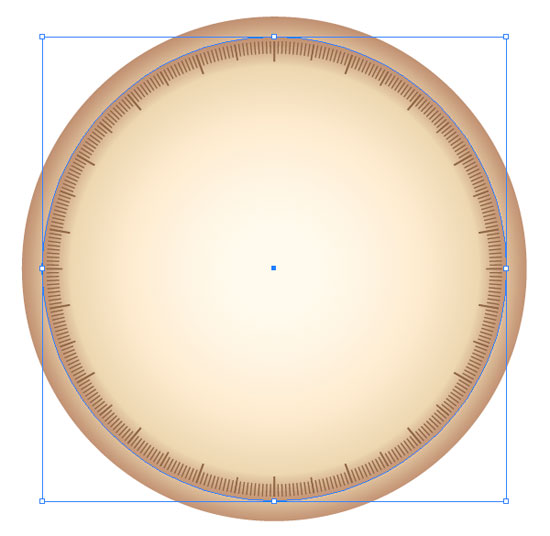
Step 14
Prepare for the text by drawing a circle inside using the Ellipse Tool (L) inside the big one and center align it with the rest
Step 15
While keeping the circle selected use the Type on a Path Tool to write the numbers on the circle that you’ve just created.
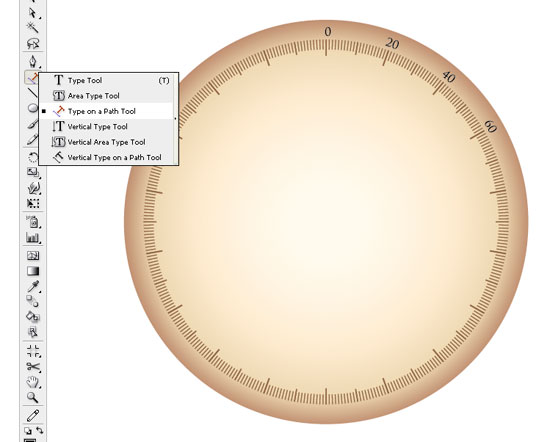
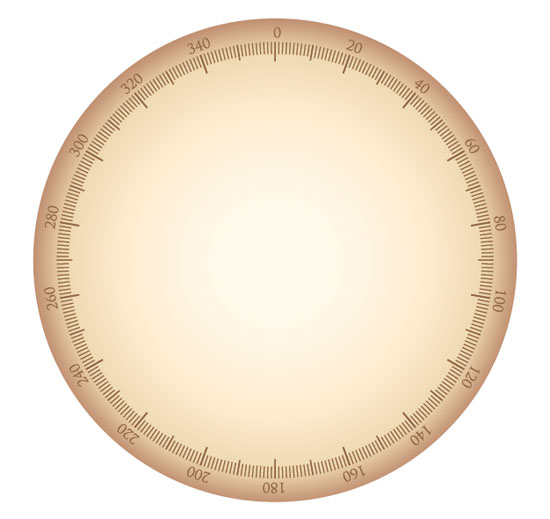
Step 16
Continue to create these numbers in increments of 20 until you are finished.
Step 17
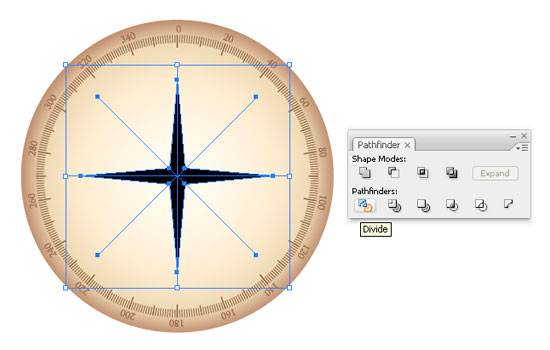
Create a star with four corners by using the Star Tool. Play around with the arrows and Command while you draw it. The one I drew is 225,887px wide.

Step 18
Now that we have a start we need to color each corner in two so we’ll have to divide it on the middle:
- Draw an empty line using the Line Segment Tool (\) that is longer than the vertical of the star.
- Copy the line and Paste in Front (Command + C and Command + F) and rotate the new one by 45 degrees using Selection Tool (V), while holding the Shift key.
- Repeat step 1 and 2 until you have four lines.
- Select the lines and the star and center align them both horizontal and vertical.
- With the lines and the star selected In the Pathfinder Panel (Shift + Command + F9) press divide.
Step 19
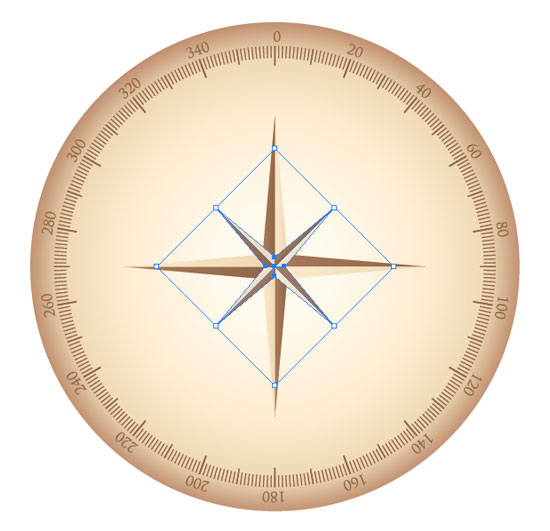
- Color the sections of the star using the Direct Selection Tool and the colors of your choice.
- Copy and Paste in Front (Command + C and Command + F) the colored star and rotate it 45 degrees using the Selection Tool (V) while holding the Shift Key.
- Make the new star smaller using the Selection Key (V) and Shift + Alt.
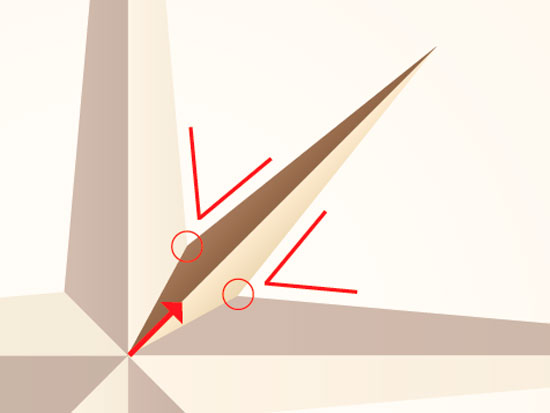
Step 20
Delete three sides of the smaller star and leave just one. Select the two anchor points you see in the above image using the Direct Selection Tool (A). Then use the Selection Tool (V) to drag the upper-right while holding the Shift key until they intersect the bigger star.
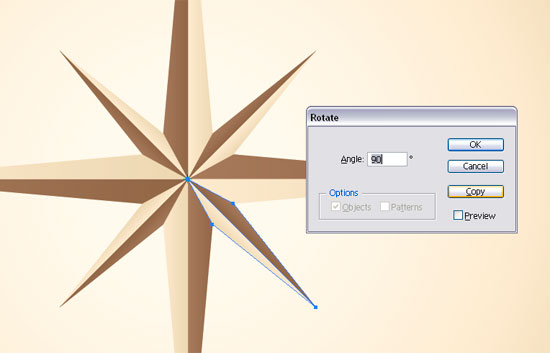
Step 21
- Select the remaining part of the small star using the Selection Tool (V), press R and drag towards the middle of the big star while holding down the Alt key.
- Once you do that enter 90 in the Rotate Dialog Box and press Copy.
- Repeat (Command + D) until you get a full star again.
Step 22
Using the Text Tool (T) enter all the text (“N,” “E,” “S,” “W,” etc…)
Step 23
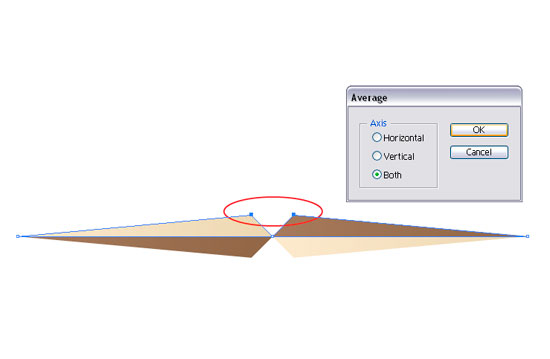
Now that we’ve created the direction markers we need to create the mobile part of the compass. Enter the group containing the big star, copy the horizontal segment (Command + C), and paste it (Command + V). Now Select the upper two anchor points using the Direct Selection Tool (A), then Right-click > Average > Both.
Step 24
Add some color to the segment to make it stand out. I’ve added the colors, as shown below.

Step 25
Using the Ellipse Tool (L) while you hold the Shift key you add two concentric circles to the center part of the mobile segment. In the image below you can see the colors I’ve used for the radial gradients, but you can also access the source files available for all Vector Plus Members.

Step 26
Group (Command + G) all the elements drawn up to now together.
Step 27
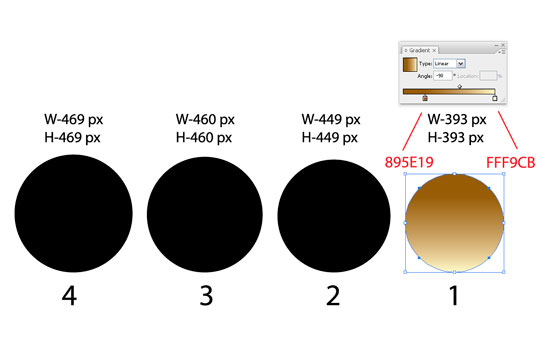
Let’s create the golden frame of the compass. Create four circles using the Ellipse Tool (L) while you hold the Shift key. Start with creating the widest and finish with the smallest. I’ve created mine with the following widths:469px, 460px, 449px, and 393px.
Step 28
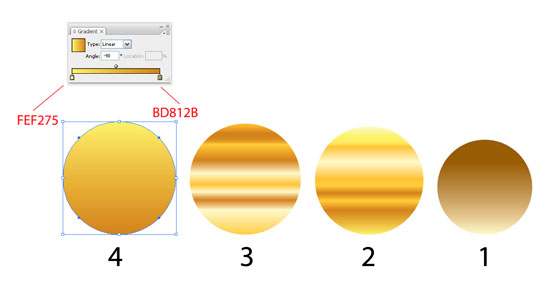
Now let’s add some gradients and group the circles together. The swatches I’ve used are available for theVector Plus Members in the original format.
Step 29
Select both the golden part and the other and arrange them using the Selection Tool (V) until you get a similar illustration to that shown below.
Step 30
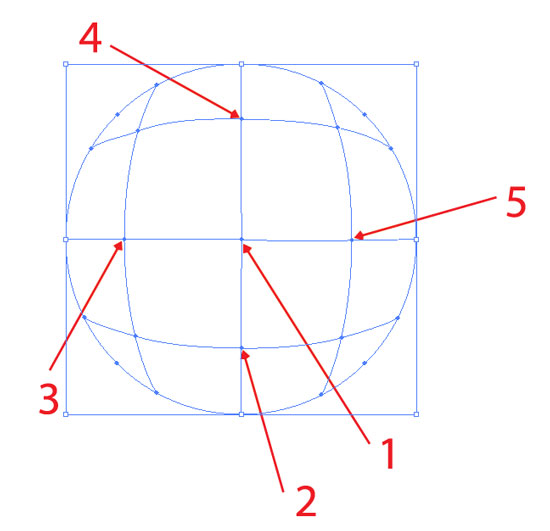
Lets add a shadow to the compass:
- Create a white circle using the Ellipse Tool (L).
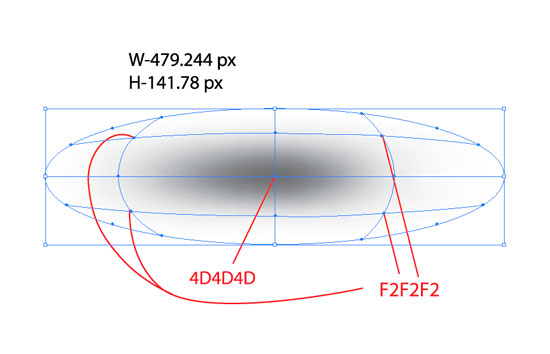
- Use the Mesh Tool (U) to add 4 mesh points.
- Use the Direction Selection Tool (A) to select the mesh points and then add the color: #4d4d4d to the center mesh point and #f2f2f2 to the outer mesh points.
- After you are satisfied with the colors, select the circle using the Selection Tool (V) and transform it into an ellipse as shown.
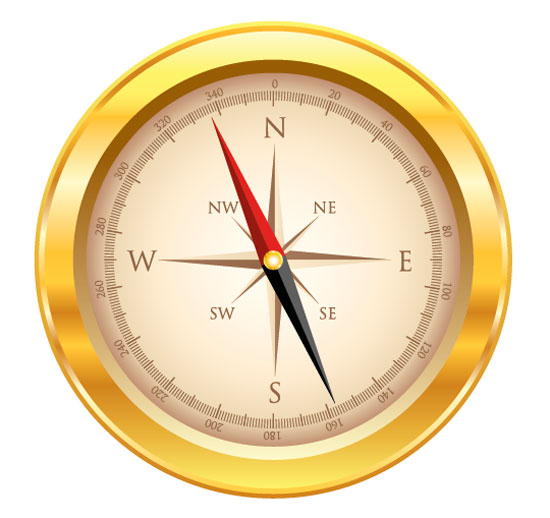
Conclusion
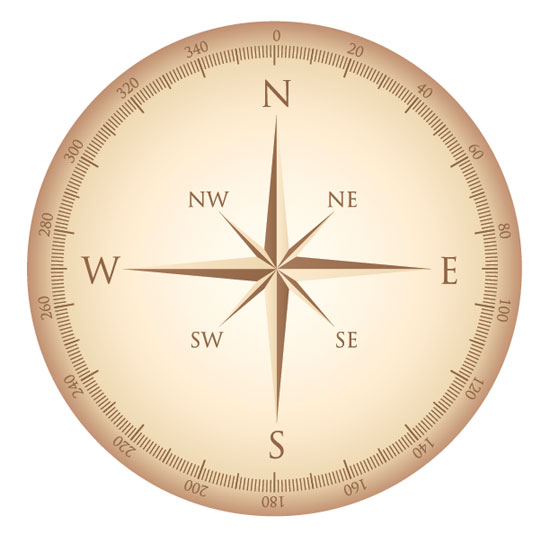
Finally add the ellipse under the compass and position it so you can emulate a light source that created a shadow. Here is the image I’ve obtained.
Subscribe to:
Post Comments (Atom)
0 komentar:
Post a Comment