Saturday, May 5, 2012

Before-agan agan try these tips, agan should ask idzin that have a copyright image, to be safe from mockery. Well this is ane gan Photo Guru, Guru is really clever barber, ane gan subscription: D
- Open Photoshop (whatever version) and then enter pictures that will be used as a color photo
- Show channels to start solving the color, WINDOW> CHANNELS> Choose the color of the contrast between the hair with a backgound detail> RIGHT CLICK> Duplicate CHANNEL

- Adjust the color levels to be clearly visible between the hairline and the background
IMAGE> Adjustments> Levels: set as shown below, or set as appropriate. Keep the background border is still visible in hand with us in order to facilitate the selection process PATH.

- Do the selection in the object model using the PATH, WINDOW> PATHS> Create a new path> Click the PEN TOOL> create a selection like the picture below

- Blocks of color with black on the part of our selection
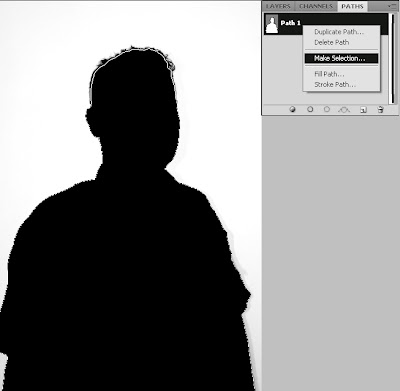
Select the PATH we have made in Pallate Path> RIGHT CLICK> FILL PATH

- Use Color choose black color: BLACK> OK

- Brush all over with the white background, to more easily done using the path selection we have made.
CLICK ON THE RIGHT PATH> MAKE SELECTION> Feather RADIUS: 0> OK
Menu Select> Inverse click the BRUSH TOOL> USE WHITE> Kuaskan in the background and caution on the part of the hair
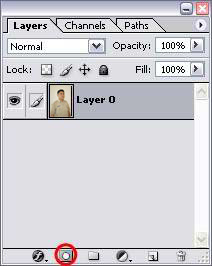
- Double click on Layer> OK, so the layer named background changed to "Layer 0"
- Menu SELECT> LOAD SELECTION> Channel: RED COPY
- Menu SELECT> Modify> Feather (CTRL + ALT + D)> 1 px
- Click the ADD LAYER MASK
- Click Menu IMAGE > ADJUSTMENTS > INVERT (CRTL+i)

- Create a New Layer by clicking "Ctrl + Shift + N" and set the foreground and background colors will we use as the basis behind the image

- Click the Filter Menu> Render> Clouds
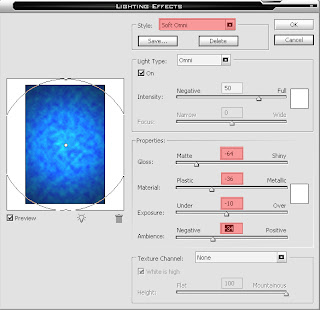
Add lighting effects: FILTER> RENDER> LIGHTING EFFECTS
Style: SOFT OMMI> Properties: adjust according to taste
- Move layer 1 to the lowest position in the background using the move tool
Duplicate Layer PHOTOS: RIGHT CLICK> Duplicate Layer

- Change Set Layer Blending Mode on Layer 0 to MULTIPLY
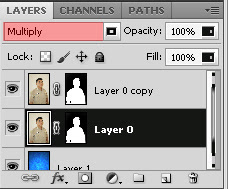
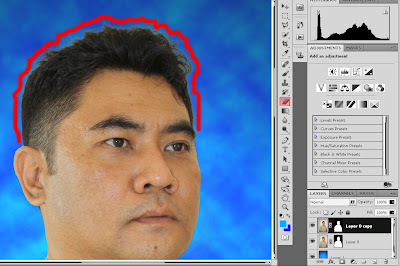
- Remove the edge of the visible white hairs on the Duplicate Layer 0 using the eraser, it is intended that the image could look more together, look at the picture below
- Duplicate Layer 0 Copy and change the bending mode of the duplicate set to HARD LIGHT.
If the Picture looks less bright or dark Curver use Level Atar (crtl + crtl + L and M)

- If the above steps correctly, then you practice you can produce images like this:
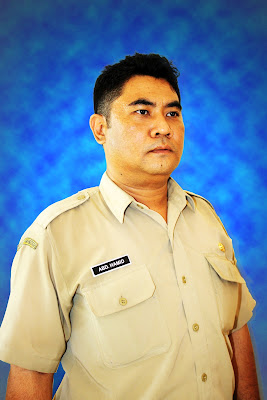
- Photos on display ready ^ _ ^! may be useful.
Subscribe to:
Post Comments (Atom)
2 komentar:
pak hamid??? hahaha
hehehe . . bu hamid :D
Post a Comment